The Real Math of Scrap-Fermented Carrot Ginger Kraut

Look, let's be real: the wellness industry loves to slap a minimalist label on a tiny jar of fermented cabbage, call it "artisanal probiotic gut-health," and charge you $14 at the boutique grocery store. That math doesn't add up.
If you want to get your immune system and gut right for spring, fermenting your own vegetables is just a practical necessity. It's not a luxury; it's a cheap, straightforward way to turn the scraps you were going to compost into high-yield food.
For Earth Day, let's cut through the performative eco-chic fluff. We aren't buying specialized fermentation crocks or ordering imported starter cultures. We are taking the carrot peels from your dinner prep, the weird knobby ends of the ginger root, and some salt, and we are letting time do the work.
The Process of Fermentation
Fermentation is just controlled decay. You are creating a saline environment where the good bacteria (Lactobacillus) thrive and the bad bacteria fail. It is a process you entirely control on your kitchen counter.
The Required Gear:
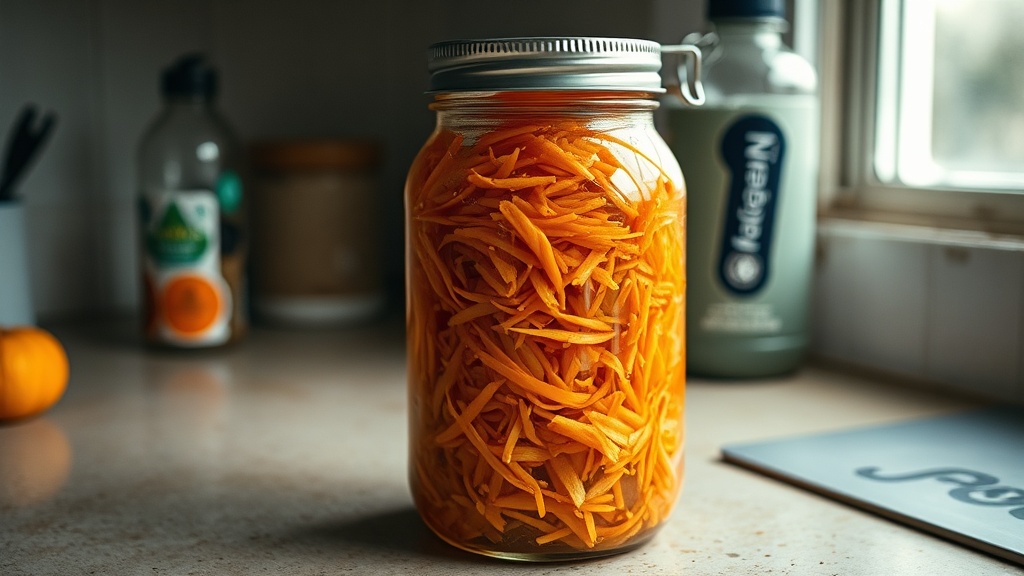
- A glass jar: A recycled pasta sauce jar works perfectly. Wash it. Don't overthink it.
- A weight: If you don't have a glass fermentation weight, fill a smaller zip-top bag with brine (salt water) and use it to hold the vegetables under the liquid line. (A small, food-safe ceramic dish works well too).
- The Raw Materials:
- 3 cups of carrot scraps (peels, ends, and shredded bits you didn't use in your salad)
- 2 tablespoons of grated ginger (skin on is fine, just scrub it)
- 1 tablespoon of non-iodized salt (sea salt or kosher)
- Filtered water (if your tap water smells heavily of chlorine, it will kill the bacteria you are trying to cultivate)
Step-by-Step Execution
- Prep the Materials: Toss your carrot scraps and ginger into a large bowl.
- The Salt Application: Sprinkle the salt over the vegetables. Now, use your hands to massage the salt into the scraps. You aren't being gentle here—squeeze them until they start weeping liquid. Let it sit for 15 minutes to pull the water out of the cell walls.
- Pack the Container: Shove the mixture into your glass jar. Press it down firmly. You want to eliminate any air pockets. The liquid released from the carrots should rise above the solid matter.
- Submerge: If there isn't enough liquid to cover the carrots entirely, mix a quick brine (1 teaspoon salt to 1 cup water) and top it off. The golden rule of fermentation: Under the brine, everything is fine.
- Weigh it Down: Apply your weight to keep the organic matter submerged.
- The Waiting Game: Loosely cap the jar (gases will form and need to escape) and leave it out of direct sunlight for 5 to 7 days.
Quality Control
Check it daily. You should see tiny bubbles rising to the surface—that’s the bacteria doing their job. If any scum forms on the surface, just scoop it off. It might smell slightly funky, but it should smell sour, not rotting.
After a week, taste it. If it has that sharp, tangy bite that makes your jaw tingle, it’s ready. Lock the lid down tight and move it to the fridge, which halts the fermentation process.
This scrap-fermented carrot ginger kraut isn't just a zero-waste win; it's a practical kitchen staple. Throw a spoonful on your eggs, mix it into a rice bowl, or eat it straight from the jar. It costs pennies, it prevents waste, and it keeps your gut healthy.